Materials/Tools needed:
Posterboard
bulk leather- 6-8 oz is prefferable, dyed or undyed, that thickness is thin enough to cut by heavy scissors but at the same time when layered has thickness enough to hold itself
DAP- yes, our trusty loyal DAP cement.
Hair spray
twist-ties (as in bread bag twist ties)
Heavy duty threading needle,available mostly at a fabric store. They are the bulkier and thicker of the needles.
Fishing Line- yes, clear,strong regular fishing line
Heavy duty scissors/shears
Hand drill
Appropriate Rivets/snaps
Any appropriate desired dyes or paints
A loyal, well made Corinthian/Spartan helm (wink!)
Lastly, and hardest to come buy, you need the hair. Now for an average crest you need about 8 oz of hair, which may seem like a little, but remember, hair weighs next to nothing, so 8oz can be a bundle! The best hair to use is very coarse, dry and stiff. The very best is actual horse hair, yes, tails from those unfortunate beasts who have passed on to the old glue factory. I prefer horse hair myself, it has the true organic look and feel for the crest. Now I've heard and actually seen some made from synthetic, wig type hairs, but they tend to not last long and kind of sheen like plastic which just seems ugly to me. I get my hair from old evilbay:
http://search.ebay.com/search/search.dl ... age=search
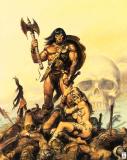
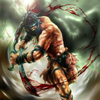
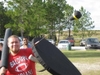
Some pics of quality made crests:


1. As far as patterns go, this is a "by the eye" type of project. There are no real patterns as the dome on each helm is different, so the curvature of the crest box will vary as well. Best thing to do is lay helmet flat on table or floor on posterboard and trace the top crest of the dome of helmet, keeping marker perpendicular to posterboard. Make the arc strips as wide as you like, I recommend leeping them under 1.5 inches, or the crest can tend to lean on the helm. You need to make 2 of these arc pieces for the outside of the box and one long strip as wide as you want your crest to be, again not to thick to avoid being bent over, and as long as you'd like. Ive seen some go all the way to the back lip of the helm, but on average you want the crest to begin at 3 inches above rim of helm front to end about same in back, above rim on back of helm. You want to include "nubs" for attaching the straight strip to helm top, ones at both ends and halfway through the middle is usually enough. Here is a rough drawing of the pieces you'll need, understanding that the angled pieces actually are supposed to be arcs matching the curvature of the dome. Black lines are where sewing will be, attaching the pieces and making our "crest box".

2. Once you have your patterns and you are confident that they will work, cut then out of leather. You can use this opportunity to dye the leather, tool, or paint anyway you like. It is best to do this now, because later once the hair is in, it can get very messy! Make sure you are working on a protected surface, newspaper or drop cloth or whatever, this can get messy!
3. Now to the hair. First, you want to cut the hair into lenghts double you want the height to be of your mohawk,plus 2 inches.I cut mine into 12 inch lenghts, giving me a average size 5 inch high crest.
The hair you have may not be the color you want, horse hair comes in organic colors: auburn, black,flaxen grey, white. Now is a good time to dye your hair, before you begin to manipulate it and put it into the crest. Bright reds are nice, bit I've every known color imaginable. Striping the crest believe it or not is pretty simple, you just seperate bundles of your cut hair into stacks and dye each stack the colors you like,just dont mix the dyed stacks,keep them seperate.After your hair is all fully dyed and dryed, which the drying process can take quite some time, you're ready for the next step, getting the hair bundled for the crest.
Take pinches of hair, usually you want to measure about a dime's circumference on the portion you took, and smooth them all tightly together. twisting them can help, just not too tight, you dont want a crooked crest. Once you have your portion of the trimmed and dyed hair, you fold that piece directly in half. Hold that piece there with one hand while you reach for a twist-tie.You want to twist-tie around the folded bundle twice: Once just past the measure of the height of your crest box-ie: 1 3/4 in, and again right before the end- about an inch from the end. It should look something like this:

just thicker and fuller.
Proceed to bundle up all your hair untill you have 8-10 hardy, thick bundles ready.
4. Getting the box ready.
For this step, you'll be adding the hair to the leather you cut and will then create into a small box to hold it all. Lay one arced piece out on your surface. First you want to drill all your holes that you'll be needing for sewing and attaching to the dome. Go ahead and drill the holes in the straight strip for attaching to the dome. Now you want to drill a series of very small holes around the outside brim of the arc for sewing those two arcs together. Like so:

Now you also want drill all your holes for attaching the sides of the box to the base strip. Like so:

5.Attaching the hair into the box.
Now you want to actually put the hair into the box. First, add a very generous layer of dap on the inside of one of your arc pieces. Give it a few minutes to dry and get tacky. Next, take your premade bundles of hair, and lay them tight packes on the arc, with the folded point being on the leather itself. IE:

this can be a good chance for you to alternate your colors if you made different colored bundles.
Once you have all your bundles onto the arc and fell they are sufficently tight, allow it to sit for a second to attach. Take the other arc and apply a generous portion of dape to the inside of that arc, and lay it perfectly over the arc with the bundled hair on it. Basically, you're making a Leather,hair ,DAP sandwich.Yum!
6.Building the box.
Once you have your sandwhich made, it is time to sew it together. Thread your heavy duty needle with the fishing line and sew together the two arc pieces, through the holes you previously drilled on the upper rim of the arcs. As so:

Now attack the sandwhich to the base strip through the holes you drilled for both. I cannot draw that, but i think you see where this is going. Once you attach the sandwhich to the base, you have a full fledged crest box almost ready to be attached to your helm.
7.Getting the hair ready.
Now that your box is built and packed and DRYED!! your ready for the hairdo! . Untwist the ties holding the hair together. You should have quite the "FROHAWK" going on. Take a hair brush and easily brush up the frohawk, making it thicker and fuller. Now, use the hair spray, and coat it in numerous coats.The Hair spray should dry instantly, leaving a real mess of a bad hair day! Again, take your brush and brush through the hair, making it even more poofyier but it will maintain its shape. Take your scissors and cut away, evening out the mohawk and making it the way you like. This step works easier with an electric hair cutting razor as well, but Some razors can easily jam on the coarse horse hair.
8.Attaching to the helm.
Once your crest is completed with the hair and assembly, it is ready for you to attach to the dome of the helm. Make sure you line it up straight and I recommend using quick rivets to attach it to the dome, so you can remove it in the future for maintanence rather easily.
And VIOLA-you have it- A crested Corinthian/Spartan Helm. This project is not so hard as it can be messy, and it can be diffcult dealing with something as stubborn as hair, but as you can see, it pays on the field, standing out and drawing attention to you, your unit, or your work. I did manage to find an old crest I made for my Corinthian SCA kit, but I didn't use horsehair on this one, made the crest out of solely leather, but tooled to match my breastplate ad standard, so I liked it. It was also in heavy storage, so it has aged over the years but is still nice:


Well I wish you all the best of luck those who attempt to make a crest for their Corinthian/Spartan helm. As with all art, it cannot be rushed and must come from you and your creativity,
Have fun!


 , some veg tanned leather for the crest, horsehair, paint, made some leather stamps from nails to tool the crest, pop rivet tool, dap adhesive/caulk, black white checkered "duck" tape, soft leather for helmet liner, and here is what I came up with for my son....


 I used the dap adhesive to glue the horsehair onto the crest before sewing it together and also to glue in the soft leather liner. The duck tape worked out well to cover sharp metal helmet edges and give a finished look to the leather liner. I printed the panther/cougar on regular printer & poked holes in the paper with a sharp dental tool to transfer the design to the leather, then tooled it with knife & stamps. When crest was done, I drilled holes in helm & pop riveted in place. I am putting closed cell foam for liner inside on top & front & back part of the helm for good fit.
 )
)