My name is Shino and I've been fighting and member of Belegarth for near eight years now. I've been sewing off and on over the same period of time. I like to challenge myself with new sewing projects and you should too. It's a great way to learn new techniques and come up with some bomb grab ideas.
But enough about that, you're here to learn or at least scroll over my thread and look at the pictures. That's ok too.
This tutorial is for those who have some basic experience with sewing so don't get mad when I don't explain every little detail. You can click on the links under the pictures for larger images.
What you will need
* Time
* Some way of making a stencil. I used bristol paper, scissors, and a ruler
* Like fabrics. Using fabrics that are similar or the same material is essential. Also, heavier fabrics will work best for this. I used duck cloth.
* A glue stick
* A sewing machine that can do zigzag stitching
* A seam ripper or razor in case you make mistakes
Step one Making the stencil
This step is optional I guess but it sure does help a lot. Also, when you finish you will have a stencil that you can use again on other projects.
This step took some of the most time. I made sure my stencil was as close to symmetrical as I could. I was also enlarging and copying someone's heraldry by hand. It's worth it to make sure your design is perfect especially if it's popular or geometric because mistakes will stand out.
Here is how it looked

http://i52.tinypic.com/6jghlc.jpg
The points of the star didn't fit my paper so I made one single point (not pictured) and just placed it where I needed it when I had to outline the stencil. NBD unless I wanted to use this stencil to spray paint or something.
Then I cut it out.

http://i56.tinypic.com/178o4y.jpg
Bright orange duck cloth.
Take your time cutting and watch out for cutting too far at your corners. It can make the fabric weak and fray. A little fraying is no big deal because the stitching you lay down on top of it will cover up a rough edge if it isn't too extreme. Heavier fabrics have an advantage here.

http://i51.tinypic.com/1zn7q15.jpg
Here it is on the white sash that it will sit on top of. Duck cloth as well. (I expect that you can sew the base for a sash yourself)

http://i53.tinypic.com/2hrg307.jpg
Here is where I cheat:
I didn't care to get that iron on applique stuff so I just used a glue stick to secure the orange image to the white sash. Logic: the glue stick has a lot of plastic in it so if I press it with a hot iron it will work just the same right? Well, kind of. But I'm making a quality product here and personally I don't like the look of fabric just adhered to garb with applique. Can't have that. But the glue get's the job done and holds the orange cloth in place while I stitch it down.

http://i52.tinypic.com/nw0lft.jpg
NOW IRON THAT SUCKA

http://i55.tinypic.com/14ecokg.jpg
Here is where the zigzag comes in.
Do a zigzag stitch around the entire image. Be sure the sash and the image are laying flat and smooth on one another to prevent tension in the fabric from distorting the image (this is your biggest enemy and if possible, maybe make sure the weaves of the fabrics line up but that's not so important)
I got a little ahead with my sewing but in the image you can see the zigzag and the heavy stitch and how this works.

http://i54.tinypic.com/or555y.jpg
Got some time to kill? Seriously, you better cause this takes a good while to complete. (Maybe it was just me because my image is the size of a dinner plate)
This is where you start your heavy stitching. This is the stitching that will secure your image and give it the legitimate look you want.
You may want to practice this on some scrap fabric if you have never done this before because you can break needles and make knots in your nice stitching. Make sure the width of the stitching is correct and double check your tension and make sure you have enough thread beforehand. (what kind of thread did I use? I dunno, black. It wasn't anything special but it was cotton and not any of that plastic/nylon stuff)
Here is a sweet diagram on how to do corners.

First: Turn the feed dog off and use a slightly wider zigzag stitch than you did the first time. You will be manually feeding the fabric to the machine. (This is only necessary if your machine does not have a stitch setting to do this. And if you do, my machine doesn't wanna fight about it?)
Second As the machine makes the stitches the thread will almost begin to overlap itself. It will mound up and if you give the fabric enough of a pull the mound of stitching will guide the needle away from the mound and you will begin to produce a thick outline. The key is to not strike the thick stitching with your needle and go backwards. Practice practice practice on scrap material before you botch up a nice project. However, once you understand it and get it down you can really pick up your speed.
(Even if your machine can be preprogrammed to do this still practice and pay close attention to the stitching because it can still make mistakes.

http://i55.tinypic.com/34ss1tz.jpg
BAM!

Some Larger images:
http://i51.tinypic.com/254vhw5.jpg
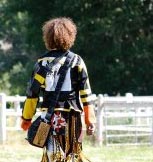
On the completed sash:
http://i53.tinypic.com/25pigjs.jpg
Question comments?
You can do this on most anything besides just sashes. I would recommended this for shield covers and tabards as they take a lot of abuse. Applique with this kind of stitching will outlast applique alone. If you really wanted to you can pin down your fabric and do this stitching by hand for a purely period project
 .
.


