Steps--
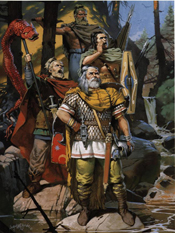
1. Think of what you want to make:
![Image](http://i13.photobucket.com/albums/a276/debuenzo/helmet%20photos/GLENHELMET001.jpg)
2. Decide:
![Image](http://i13.photobucket.com/albums/a276/debuenzo/helmet%20photos/GLENHELMET002.jpg)
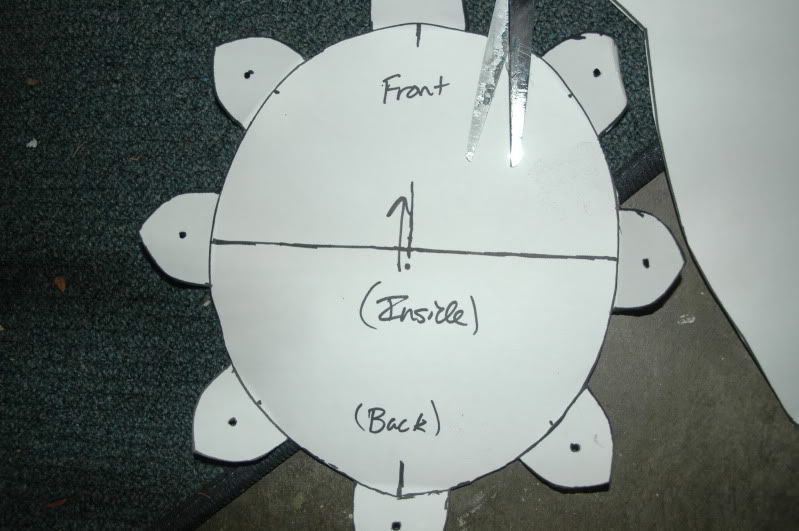
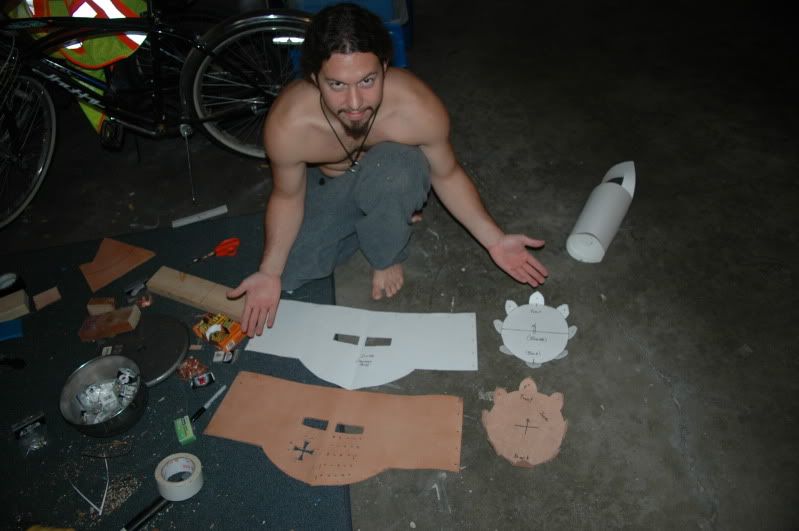
3. Trace helmet onto posterboard:
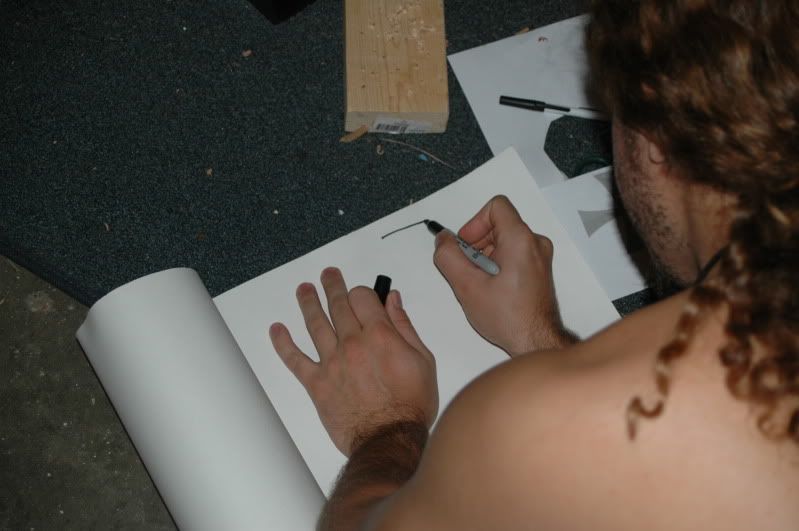
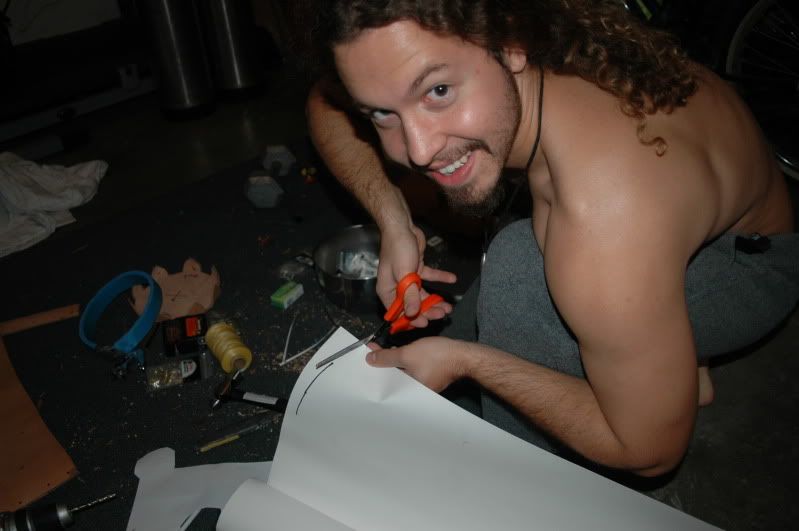
![Image](http://i13.photobucket.com/albums/a276/debuenzo/helmet%20photos/GLENHELMET003.jpg)
4. Cut it out:
![Image](http://i13.photobucket.com/albums/a276/debuenzo/helmet%20photos/GLENHELMET006.jpg)
![Image](http://i13.photobucket.com/albums/a276/debuenzo/helmet%20photos/GLENHELMET007.jpg)
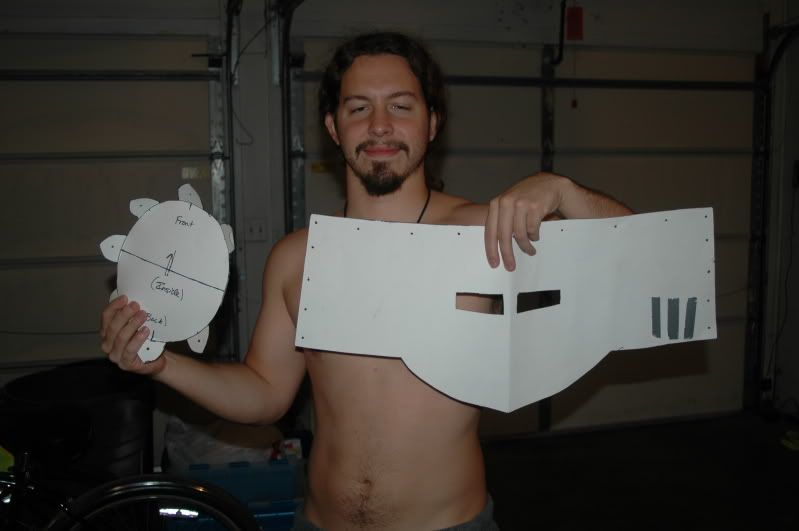
5. Clearly label all pieces:
![Image](http://i13.photobucket.com/albums/a276/debuenzo/helmet%20photos/GLENHELMET009.jpg)
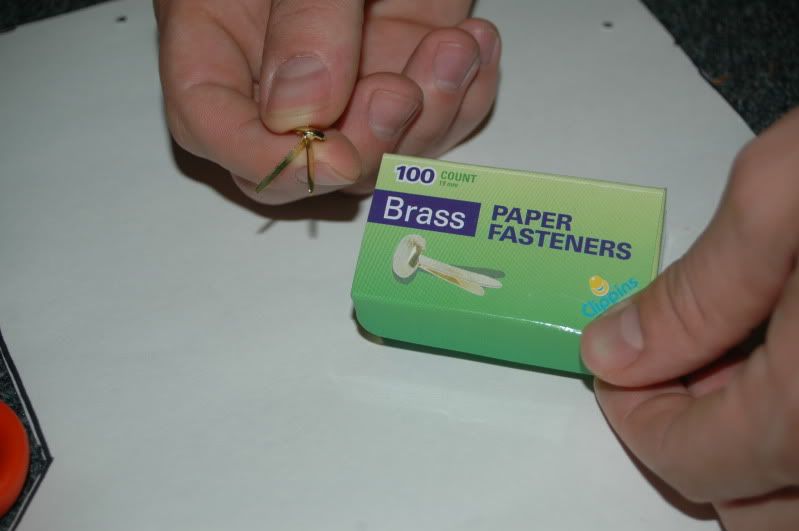
6. Use brass brads to hold it together:
![Image](http://i13.photobucket.com/albums/a276/debuenzo/helmet%20photos/GLENHELMET010.jpg)
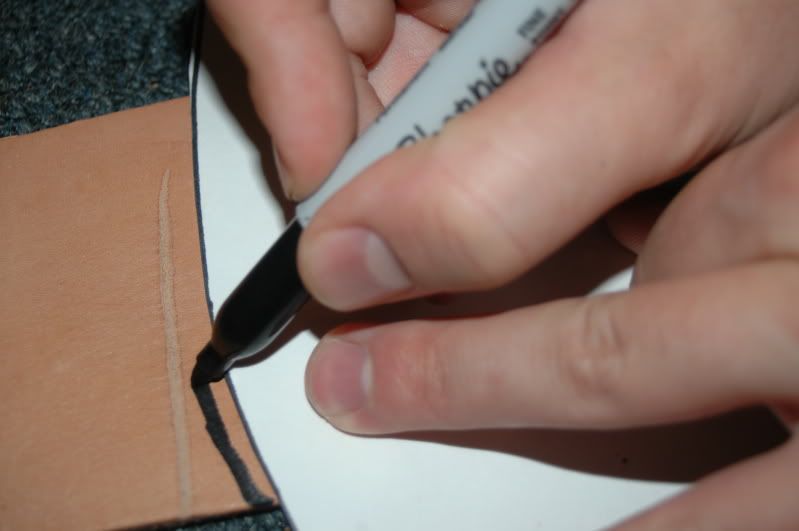
7. If the helmet fits, transfer the pattern to leather:
![Image](http://i13.photobucket.com/albums/a276/debuenzo/helmet%20photos/GLENHELMET011.jpg)
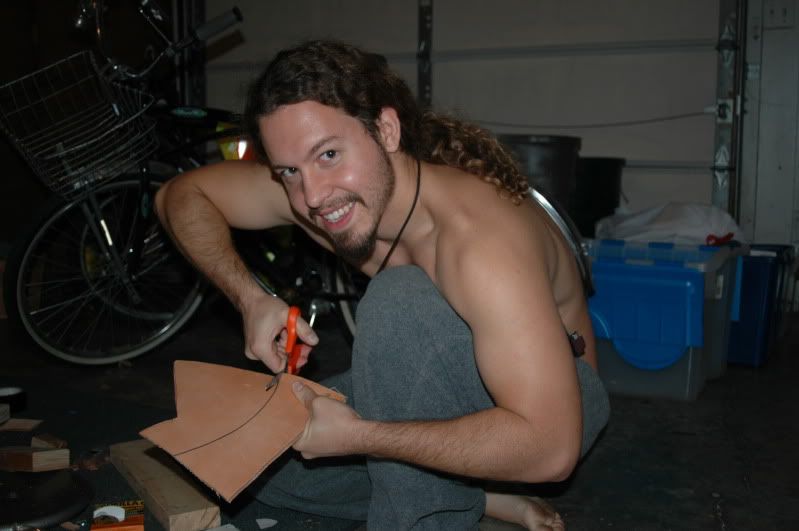
8. Cut out the leather:
![Image](http://i13.photobucket.com/albums/a276/debuenzo/helmet%20photos/GLENHELMET012.jpg)
![Image](http://i13.photobucket.com/albums/a276/debuenzo/helmet%20photos/GLENHELMET014.jpg)
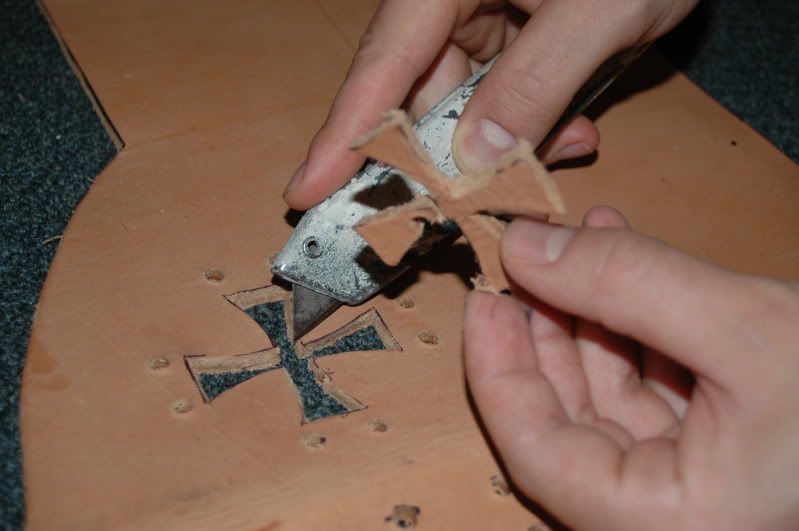
9. Use a utility blade for details and such:
![Image](http://i13.photobucket.com/albums/a276/debuenzo/helmet%20photos/GLENHELMET018.jpg)
![Image](http://i13.photobucket.com/albums/a276/debuenzo/helmet%20photos/GLENHELMET017.jpg)
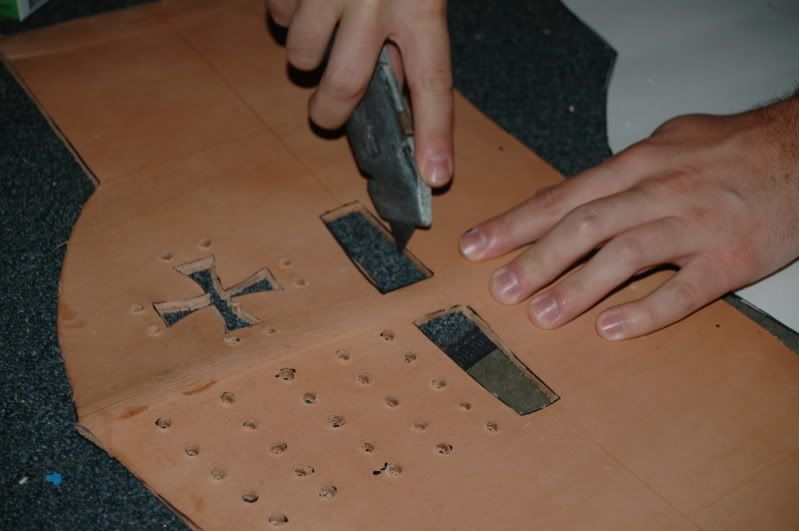
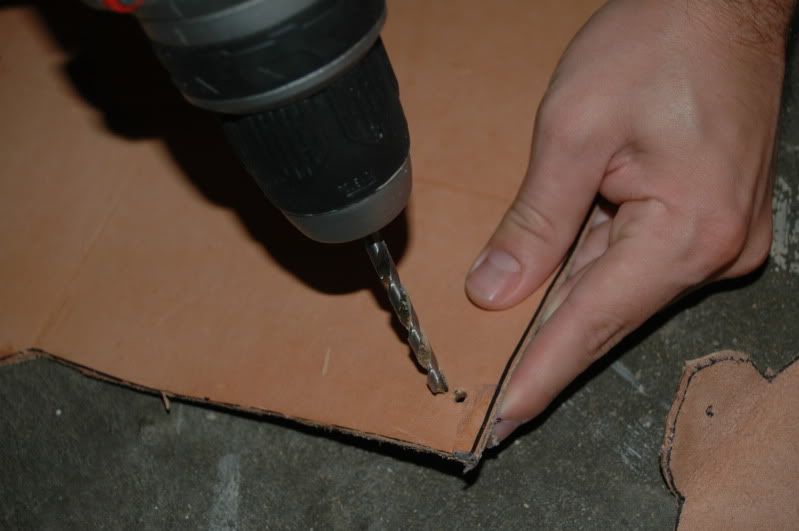
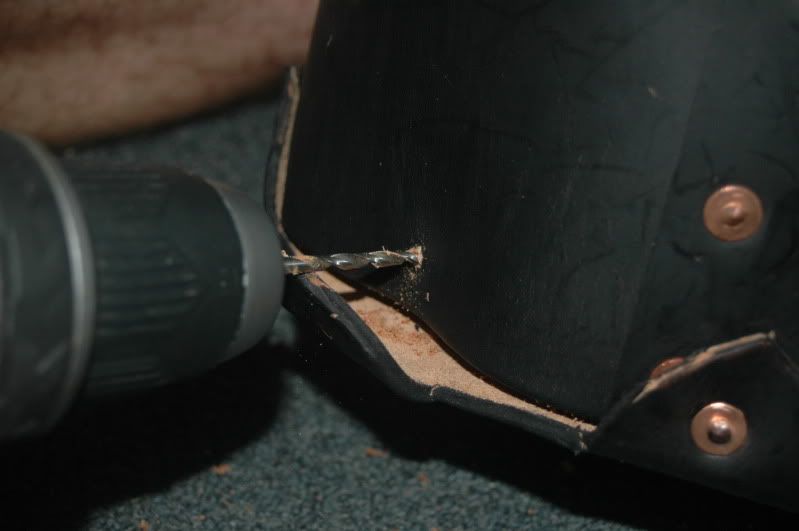
10. Use a drill for the holes:
![Image](http://i13.photobucket.com/albums/a276/debuenzo/helmet%20photos/GLENHELMET015.jpg)
![Image](http://i13.photobucket.com/albums/a276/debuenzo/helmet%20photos/GLENHELMET016.jpg)
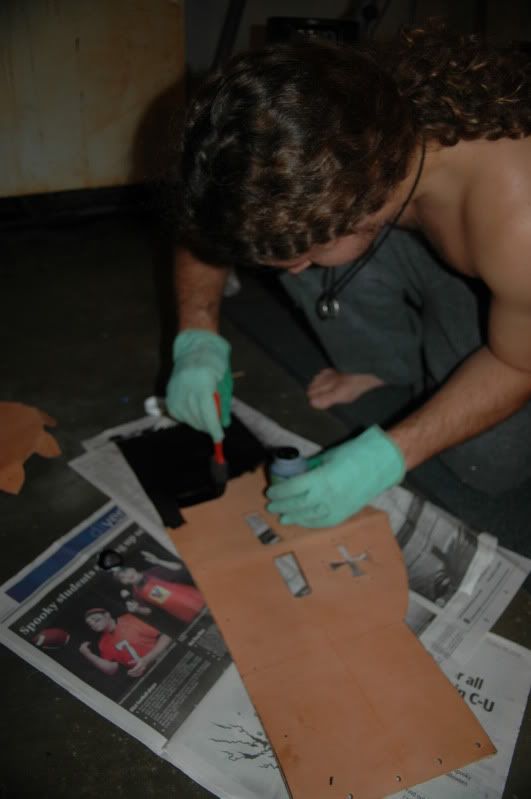
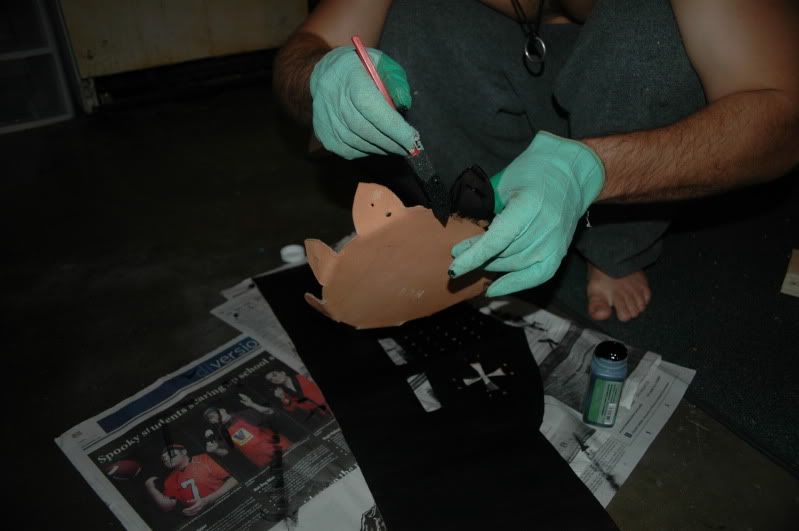
11. Dye the leather, using whatever dye and color you like (using gloves will keep your hands clean):
![Image](http://i13.photobucket.com/albums/a276/debuenzo/helmet%20photos/GLENHELMET023.jpg)
![Image](http://i13.photobucket.com/albums/a276/debuenzo/helmet%20photos/GLENHELMET025.jpg)
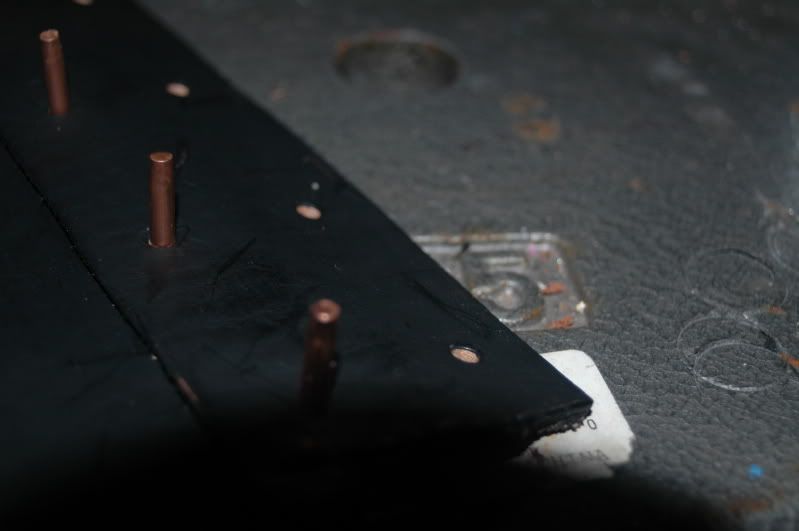
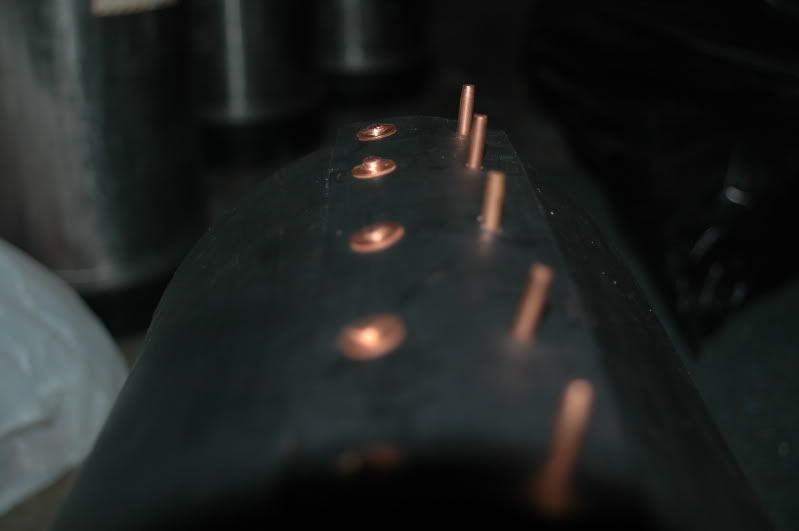
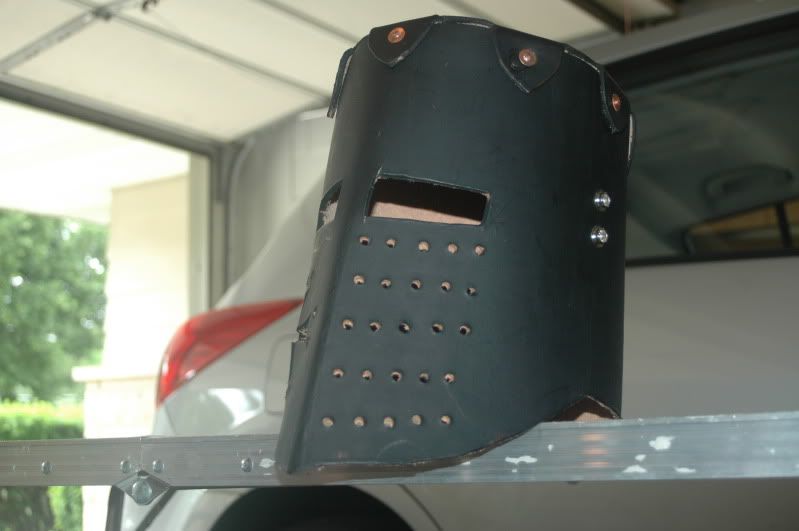
12. Use rivets to put the helmet together:
![Image](http://i13.photobucket.com/albums/a276/debuenzo/helmet%20photos/DSC_0007.jpg)
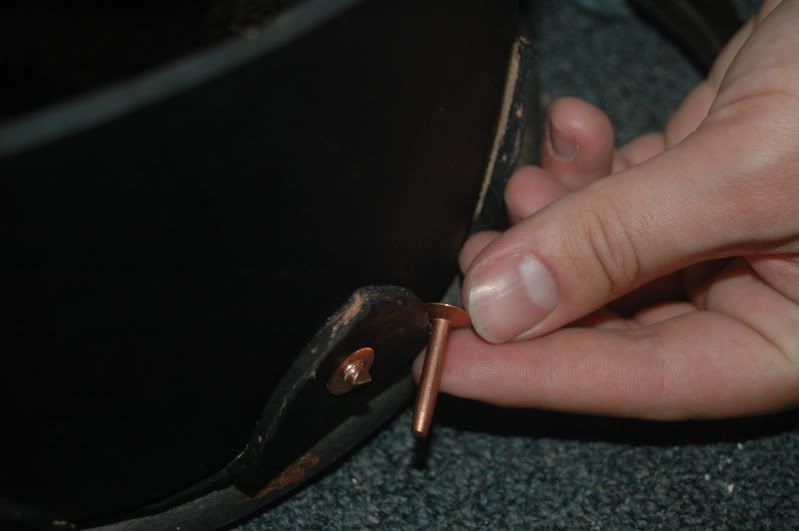
13. Put the post through the two holes from each piece:
![Image](http://i13.photobucket.com/albums/a276/debuenzo/helmet%20photos/Jamaica2009171.jpg)
14. Then put a washer on and tamp down, using the rivet setter(hole part):
![Image](http://i13.photobucket.com/albums/a276/debuenzo/helmet%20photos/Jamaica2009172.jpg)
![Image](http://i13.photobucket.com/albums/a276/debuenzo/helmet%20photos/Jamaica2009173.jpg)
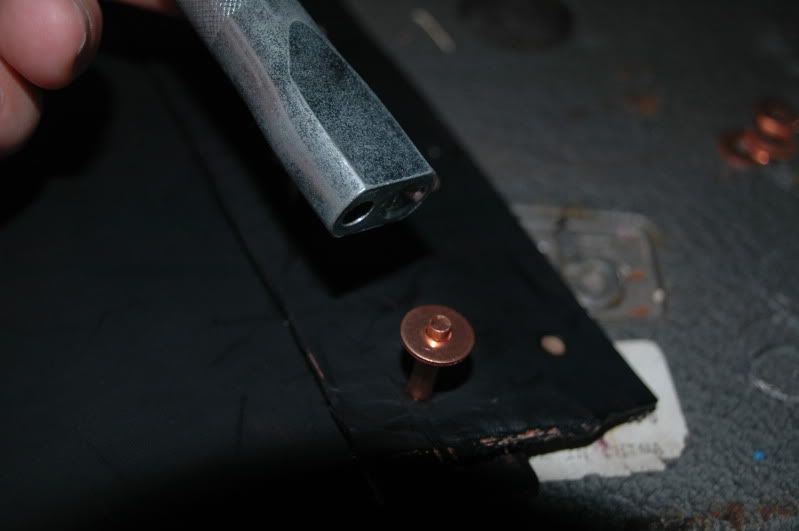
15. Cut off the excess post:
![Image](http://i13.photobucket.com/albums/a276/debuenzo/helmet%20photos/Jamaica2009175.jpg)
![Image](http://i13.photobucket.com/albums/a276/debuenzo/helmet%20photos/Jamaica2009176.jpg)
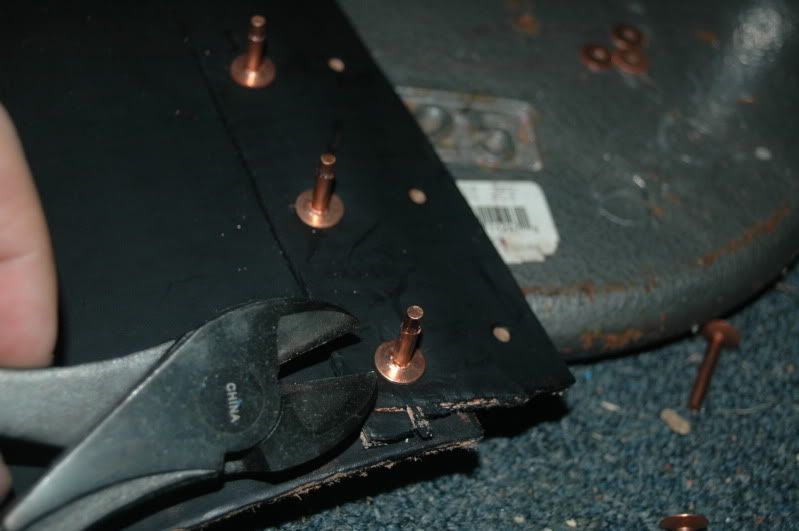
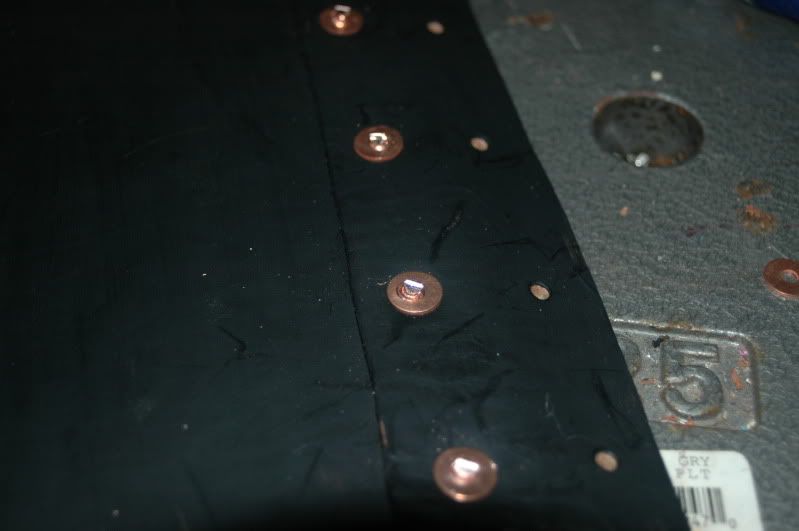
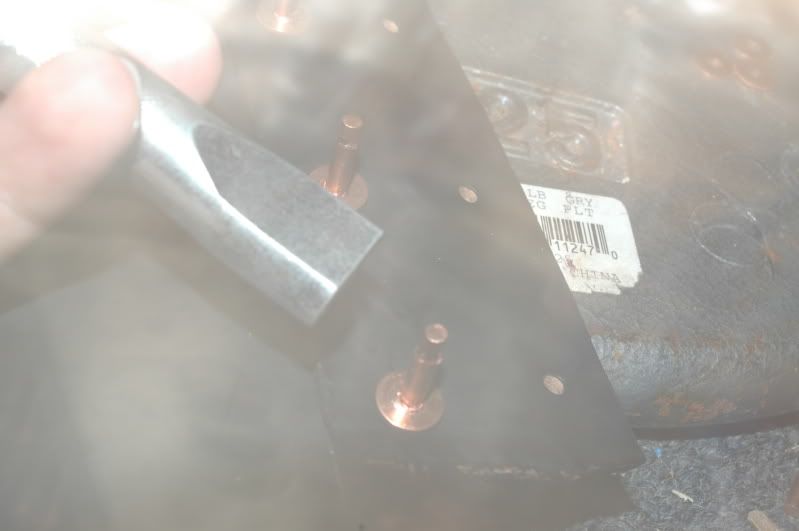
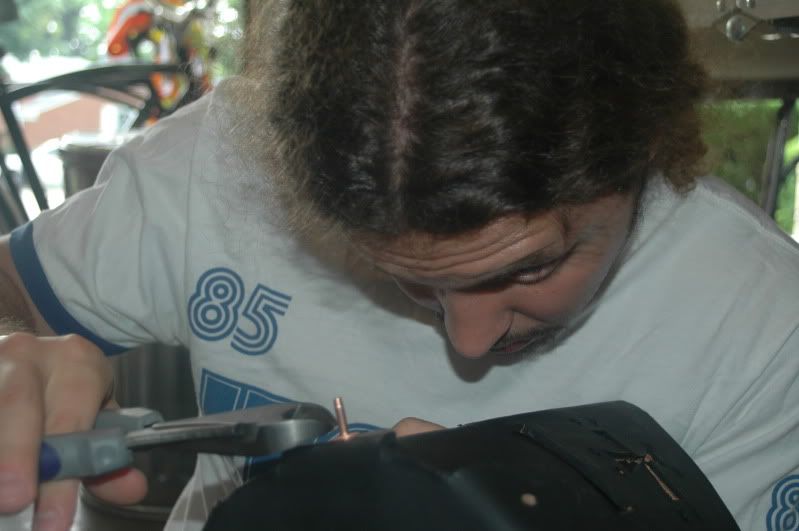
16. Again using the rivet setter (rounded out area), pound the post over the washer:
![Image](http://i13.photobucket.com/albums/a276/debuenzo/helmet%20photos/Jamaica2009177.jpg)
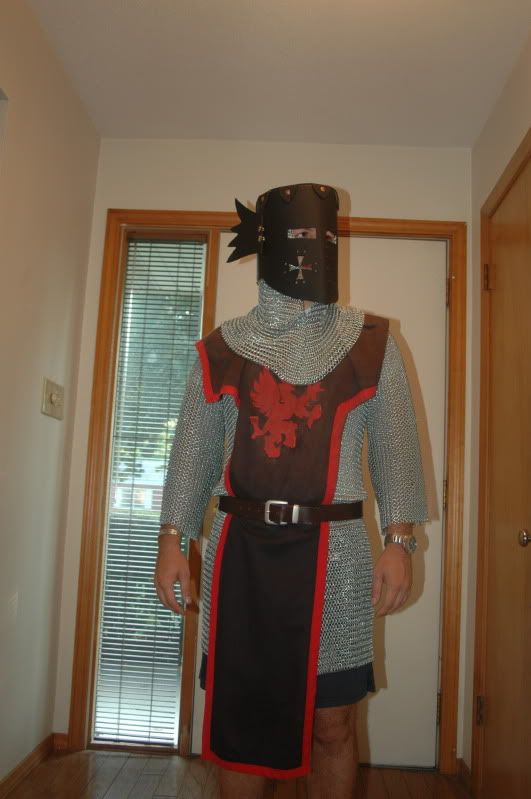
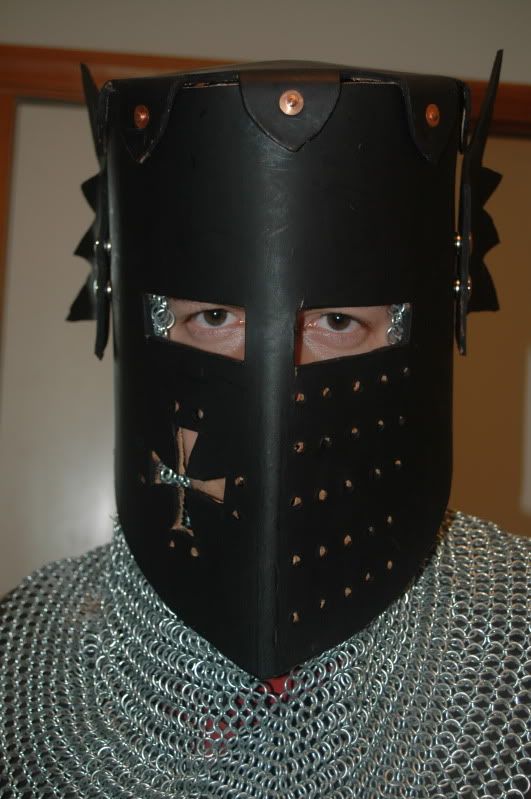
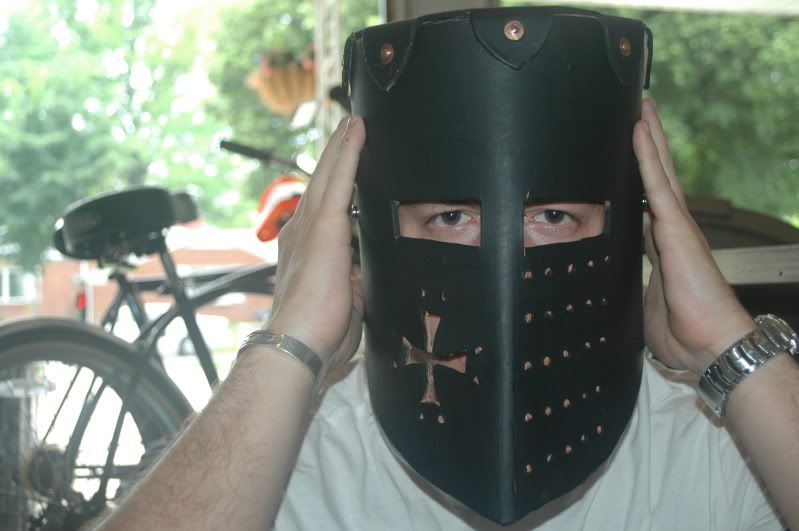
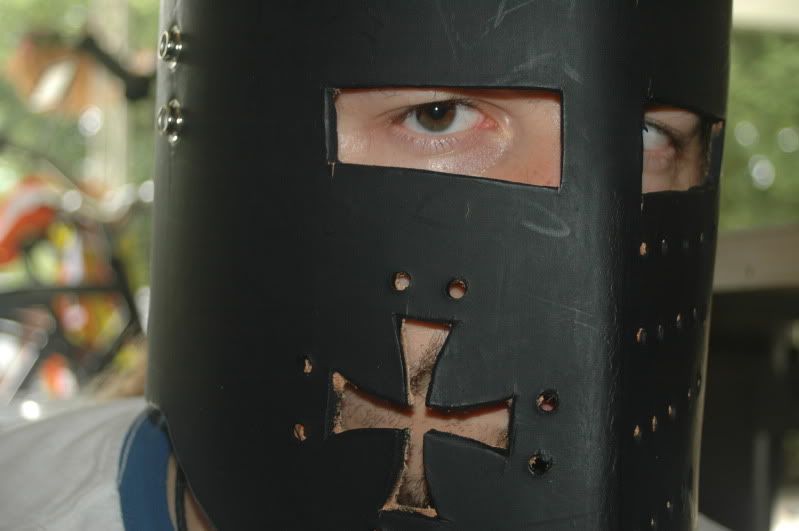
17. Continue until the helmet is finished:
![Image](http://i13.photobucket.com/albums/a276/debuenzo/helmet%20photos/Jamaica2009178.jpg)
![Image](http://i13.photobucket.com/albums/a276/debuenzo/helmet%20photos/DSC_0005.jpg)
![Image](http://i13.photobucket.com/albums/a276/debuenzo/helmet%20photos/DSC_0002.jpg)
![Image](http://i13.photobucket.com/albums/a276/debuenzo/helmet%20photos/DSC_0008.jpg)
![Image](http://i13.photobucket.com/albums/a276/debuenzo/helmet%20photos/DSC_0011.jpg)
![Image](http://i13.photobucket.com/albums/a276/debuenzo/helmet%20photos/DSC_0012.jpg)